

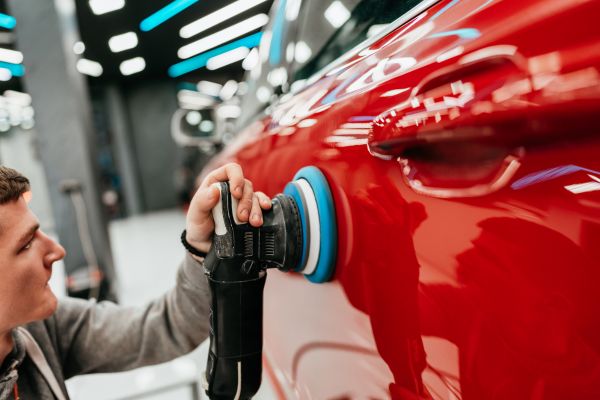
A clean car always feels better to drive. Not just because it looks sharper, but because every surface seems to work with you again. The windshield is clearer, the seats feel fresher, the paint catches the light properly, and the little forgotten corners stop collecting dust like they have been hiding a secret. Good detailing is not about rushing through a wash and hoping the car looks decent from ten feet away. It is about slowing down enough to notice the areas that usually get skipped.
A proper car detailing checklist helps turn the process into something calm and organized. Instead of jumping from wheels to windows to seats and back again, you move through the car in a sensible order. That saves time, prevents re-cleaning, and gives the finish a more professional feel. Whether you are detailing before a long drive, preparing to sell your vehicle, or simply bringing it back to life after months of daily use, the right approach makes all the difference.
Start With the Right Mindset
Car detailing works best when you treat it as a full reset, not a quick tidy-up. A regular car wash removes surface dirt. Detailing goes deeper. It focuses on paint, wheels, glass, trim, upholstery, carpets, storage areas, vents, door jambs, and all the small spaces that make a car feel truly clean.
Before beginning, choose a shaded place if possible. Direct sunlight can dry soap, water, and cleaning products too quickly, leaving streaks or water spots behind. Make sure the surfaces are cool to the touch. A hot hood or windshield can make even simple cleaning more difficult than it needs to be.
It also helps to gather everything before starting. Clean microfiber towels, wash mitts, buckets, brushes, glass cleaner, interior cleaner, tire cleaner, vacuum, applicator pads, and protective products should be close by. When everything is ready, the job feels smoother and less tiring.
Clear Out the Interior First
The best place to begin is inside the car. Remove loose items from the seats, cup holders, door pockets, glove box, trunk, and center console. Old receipts, empty bottles, coins, food wrappers, parking slips, and forgotten cables can make the interior look messier than it really is.
Once the clutter is gone, you can actually see what needs attention. This step may seem small, but it sets the tone for the whole detail. A clean interior starts with open surfaces, and open surfaces are much easier to vacuum, wipe, and refresh.
Take out the floor mats as well. Shake them outside and set them aside for separate cleaning. Dirt often hides underneath them, especially near the driver’s pedals and along the edges of the carpet.
Vacuum Every Interior Surface Carefully
Vacuuming is where the interior begins to change. Start from the top areas and work down. Seats, seams, carpets, mats, trunk space, and tight gaps between the seat and center console all need attention. Use narrow attachments for edges and soft brushes for delicate areas.
Seat stitching can trap crumbs and dust, especially in family cars or vehicles used daily for commuting. Move the seats forward and backward to reach the rails and hidden carpet underneath. These areas are easy to ignore, but they collect a surprising amount of dirt.
Do not rush the trunk. It often carries groceries, tools, sports gear, luggage, and random household items, so dust and grit build up there quietly. A freshly vacuumed trunk makes the whole car feel more complete.
Clean the Dashboard, Console, and Door Panels
Once the dust is removed, wipe the hard surfaces. The dashboard, steering wheel, gear selector, center console, cup holders, buttons, handles, and door panels all pick up fingerprints, body oils, dust, and everyday grime.
Use a cleaner suited for automotive interiors rather than something overly harsh. Spray the product onto a microfiber towel instead of directly onto electronics, screens, or buttons. This gives more control and reduces the chance of liquid getting into sensitive areas.
Air vents deserve special attention. Dust sitting inside vents can blow back into the cabin as soon as the fan turns on. A soft detailing brush helps loosen dirt from vent slats, buttons, seams, and textured surfaces.
Refresh the Seats and Upholstery
Seats need a different approach depending on the material. Fabric seats usually benefit from vacuuming first, followed by gentle cleaning for stains and high-contact areas. Avoid soaking the fabric, as too much moisture can lead to slow drying and unpleasant smells.
Leather or synthetic leather seats should be wiped with a suitable cleaner and then protected if needed. Pay attention to bolsters, armrests, and the driver’s seat, because those areas get the most contact. Even when seats do not look dirty at first glance, a careful wipe often reveals a thin layer of grime.
The goal is not to make the seats shiny. In fact, overly glossy interior surfaces can look unnatural and may feel slippery. A clean, soft, natural finish usually looks better and ages more gracefully.
Wash Floor Mats Separately
Floor mats take the worst of daily use. Mud, sand, spilled drinks, rainwater, and shoe marks all end up there. Rubber mats can usually be rinsed, scrubbed, and dried easily. Carpet mats need vacuuming, spot cleaning, and enough drying time before being placed back inside.
Never put damp mats back into a closed car. Moisture can create a musty smell, especially in warm weather. Let them dry fully in open air. This one detail makes a bigger difference than people expect.
Move to the Exterior Rinse and Wash
After the interior is under control, turn to the outside. Begin with a thorough rinse to remove loose dirt and grit. This helps reduce the chance of scratching the paint during washing. Start from the top and work downward, allowing dirt to flow away naturally.
Use a proper car wash soap and a clean wash mitt. Household detergents can be too harsh for automotive finishes and may strip protective layers. Wash one section at a time, rinsing often. The roof, glass, hood, trunk, doors, bumpers, and lower panels should all get careful attention.
The lower parts of the car are usually the dirtiest, so leave them for later in the wash process. This keeps heavy grit away from cleaner upper panels.
Give Wheels and Tires Their Own Attention
Wheels are exposed to brake dust, road grime, tar, and dirt. They need dedicated cleaning rather than a quick splash of soapy water at the end. Clean one wheel at a time so products do not dry on the surface.
Use brushes that can reach between spokes, around lug nuts, and into the wheel barrel if accessible. Tires should be scrubbed as well, not just dressed. A clean tire sidewall allows any protective finish to sit more evenly and look better.
Wheels can transform the appearance of a car. Even if the paint is clean, dirty wheels make the whole vehicle look unfinished.
Clean the Glass Inside and Out
Glass is one of the most important parts of a car detailing checklist because it affects both appearance and driving safety. Exterior windows collect dust, rain spots, road film, and insect marks. Interior glass gathers fingerprints, vapor residue, and haze from plastics and air circulation.
Use a clean microfiber towel and a good glass cleaner. Work in straight motions and inspect from different angles. The windshield can be tricky because streaks often appear only when sunlight hits it or when driving at night. Take extra time here. Clear glass makes the cabin feel brighter and the road easier to read.
Do not forget mirrors, rear windows, sunroofs, and small quarter windows. They may be small, but when they are clean, the whole detail feels more polished.
Dry the Paint Without Leaving Marks
Drying is not just the final part of washing. It is a step that protects the finish from water spots. Use soft, clean microfiber drying towels and work gently over the surface. Avoid dragging dirt across the paint, especially if water has pooled around badges, mirrors, handles, or trim.
Open the doors, trunk, and fuel door to wipe hidden water from edges and jambs. These areas often drip later and leave streaks down freshly cleaned paint. It is a small thing, but it separates a careful detail from a rushed wash.
Protect the Paint and Exterior Trim
Once the paint is clean and dry, protection helps maintain the result. Wax, sealant, or ceramic-style spray can add gloss and make future cleaning easier. Apply the product according to its instructions and avoid using too much. Thin, even application usually works better than heavy layers.
Exterior plastic and rubber trim may also need attention. Faded trim can make a clean car look older than it is. A suitable trim protectant can restore a richer appearance without making the surface greasy.
This stage gives the detail its finished look. The paint reflects better, the trim looks deeper, and the car feels cared for rather than just washed.
Check the Small Forgotten Areas
The final inspection is where missed spots show themselves. Look around badges, fuel caps, door handles, mirrors, license plate edges, exhaust tips, seat rails, cup holders, pedals, and door jambs. These small places collect dirt quietly, and they stand out once the larger areas are clean.
A true detail is often judged by these corners. Anyone can wash the hood and doors. The careful work shows in the places most people overlook.
Conclusion
A good car detailing checklist is not about making the job complicated. It simply gives the process a natural rhythm, from clearing the interior to finishing the paint and checking the hidden edges. When each area gets its turn, the result feels balanced. The car looks cleaner, smells fresher, and feels more pleasant to use every day.
Detailing also changes how you notice your vehicle. You see the dust in the vents, the marks on the mats, the haze on the glass, and the shine waiting under a layer of road film. Then, little by little, the car comes back to itself. That is the quiet satisfaction of doing it properly: not just a clean car, but a car that feels looked after.
